Caitlin Schneider and I (Julien Renard) went to the Wedgemount glacier to practise crevasse rescues.
Are you confident travelling on a glacier? Can you self-arrest? Can you rescue people out of a crevasse?
While these are perfectly valid questions to ask before embarking on some mountaineering adventure with only one other partner, they can be a lot more ambiguous than one might suspect. In the context of the VOC, I believe many people would think back to their Glacier school trips and answer yes to all of the above without really considering the limitations of their previous training (I am sure I have). Unfortunately, self-arresting on a two-person rope team when your 90kg partner just fell through a snow bridge is a lot more brutal than when the last member of a four-person rope team runs backward to simulate a fall. Knowing the individual steps of setting up a rescue system does not mean you are prepared to set up the whole thing on your own, or that the system will work with limited manpower.
So during this extremely hot weekend in June, Caitlin and I hiked up to the Wedgemount glacier looking for deep enough crevasses to practice crevasse rescue for two-person rope teams. Hiking up with heavy backpacks from which protruded four ropes, three different ice axes and several pickets got us a few odd looks from people going up in running shoes. While there was still snow at the lake, a freezing level above 4000m was rapidly taking care of that. Given the snow conditions and the weight of our packs, we didn’t want to go all the way to the huge seracs field at 2400m and instead settled for the “ice cave” at the bottom of the glacier to use as our playground. The hole seems much larger than it was a year ago (http://www.ubc-voc.com/phorum5/read.php?1,113611,114162#msg-114162).

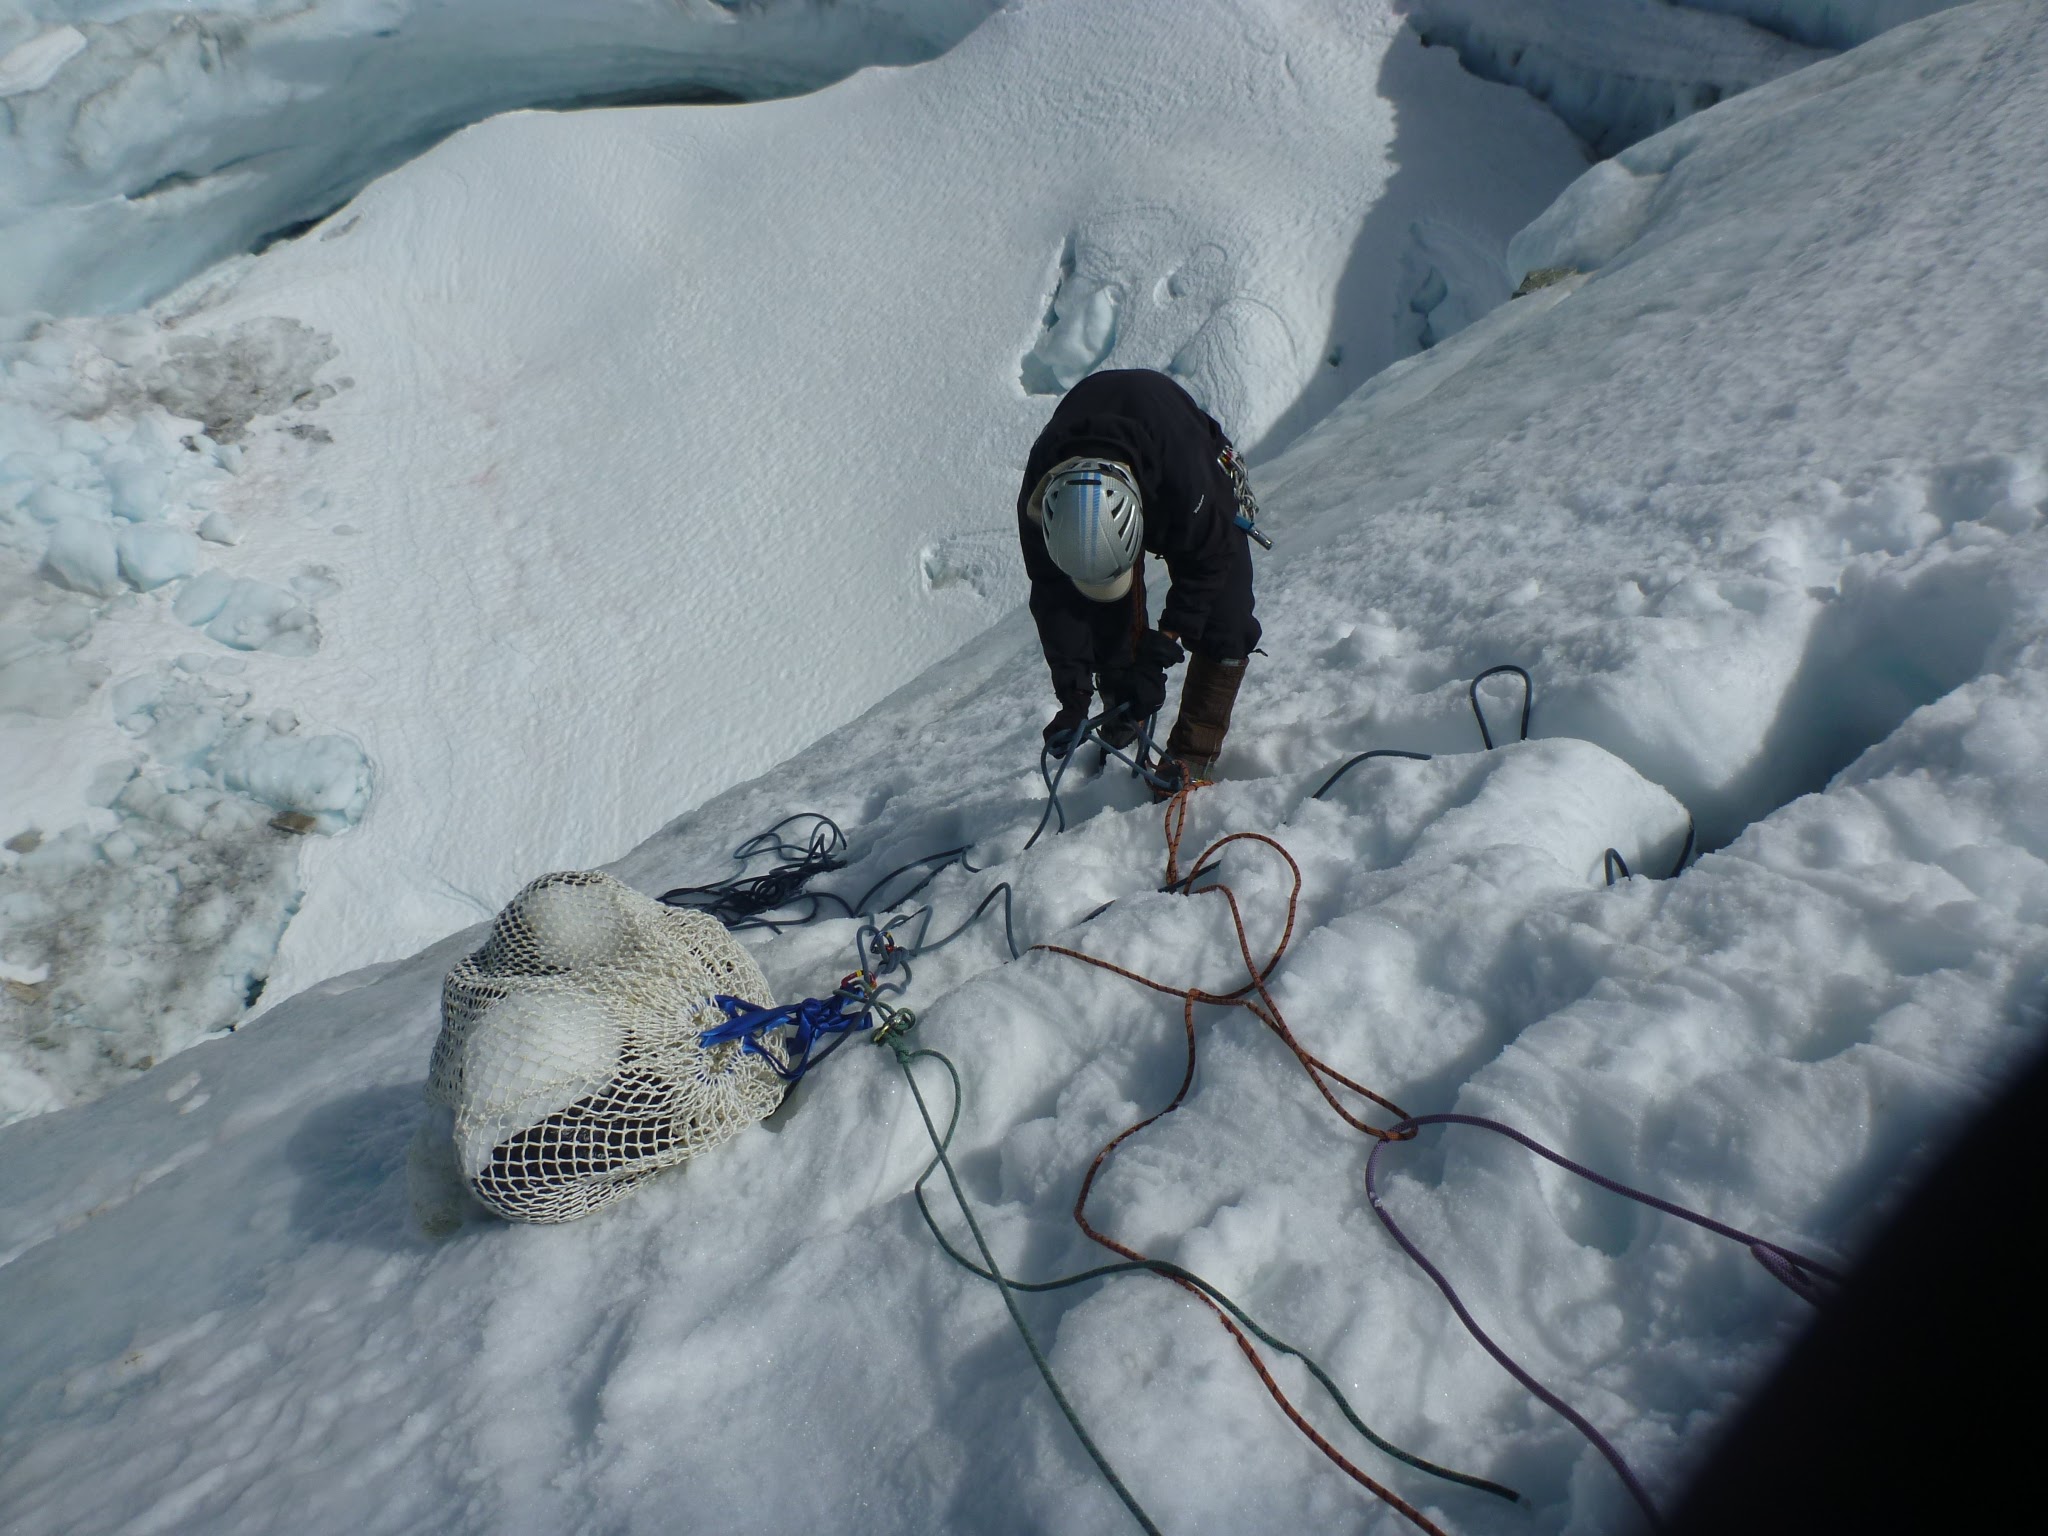
Wedgemount glacier vortex of doom. The bag is hanging on a rope, near the bottom. Photo by Julien Renard
We set up our main anchor at the top of a ~20° snow slope going straight down the vortex, with an icy overhanging runout. The “victim” would be this big custom-made net bag filled with approximately 90kg of snow. A few problems became immediately apparent. First, the innermost “onion ring” ice shelf that had partially collapsed into the vortex was creating a ledge 5m below the overhang and the bag was not able to clear it. We spotted a notch in the ledge, a few meters on the side, and decided to give it a go after putting a redirect on the rope . Success! the bag plummeted to the bottom of the hole and despite the extremely isothermal snow, the anchor looked fairly happy to support the load.
The other and more serious problem came from the amount work and time needed to get the bag out.

The 90kg “victim”. Photo by Caitlin Schneider
Hauling station. Photo by Caitlin Schneider
Last year at G1, we practised self-arrest by having people jumping in crevasses and having three people to pull them out using a 2:1 pulley system. This worked well and would take about 20s to get them out. Here, using a 3:1 system was a full body workout and one of us needed to be right at the edge of the crevasse to pull the bag over the lip. We spent the rest of the day experimenting with different hauling systems, including a Mammut rescyou system, and trying to find the most efficient way to get the bag out of the hole.
The following day, we quickly reset the anchors and hauling station and got ready to practice self-arresting when yet another problem became apparent. While the bag had had enough momentum to clear the ledge below the overhang when free-falling, dragging a climber slowed it down enough that this was no longer possible. As a result, we would find ourselves hopelessly pulled toward the crevasse for 5m before getting to a complete stop, as the bag gently landed on the ledge. A wee bit of frustration and expletives later, we came to the conclusion that we would just have to abandon self-arrest practice for this trip. There was no better location in sight, nor the time to reset the whole system.
After that, we practised building an anchor while in a self-arrest position. I would lift the bag a few meters and Caitlin would get in self-arrest position. I would then release the bag and Caitlin had to hold the fall, build an anchor and escape the system. The snow was deep enough that once you dug your feet in, it was not a problem to use your ice axe to pound in a picket or dig a trench to set up a deadman.
The last aspect of crevasse rescue that we practised was rappelling down to an unconscious partner and getting both yourself and the victim out of the crevasse (i.e. going over the lip of the crevasse). In this case, my partner was once again 90kg of snow loaded in the net. This proved to be extremely difficult. Due to the overhang, my rope was pushed against the icy lip and I was not able to push myself and the rope away from the wall. As a result, it became impossible to slide my prusiks up the rope. I experimented with various systems, including aiding on one of my ice tools to get my weight off the rope, which didn’t work due to the rope stretch. I was completely stuck just under the lip and actually getting a bit worried given the amount of time spent under several tons of ice threatening to fall in the vortex. Saving myself was hard enough, never mind helping my unconscious partner dangling next to me. I could have used both my ice tools to climb over the lip but I wanted to see if it there was another way, since you usually don’t travel on glaciers with two ice tools. Eventually, replacing the top prusik by my micro traxion pulley, used as an emergency ascender, solved the problem. The micro traxion slides much more easily than a prusik and can be operated one-handed, even after I put my weigh on it. As for saving my “partner”, I set up the Mammut rescyou system in self-rescue mode on his rope and operated the pulley system. This worked to some extent, but I still had to periodically position myself above the bag and move the rope away from the lip to relieve the tension on the rope and very slowly bring it up.
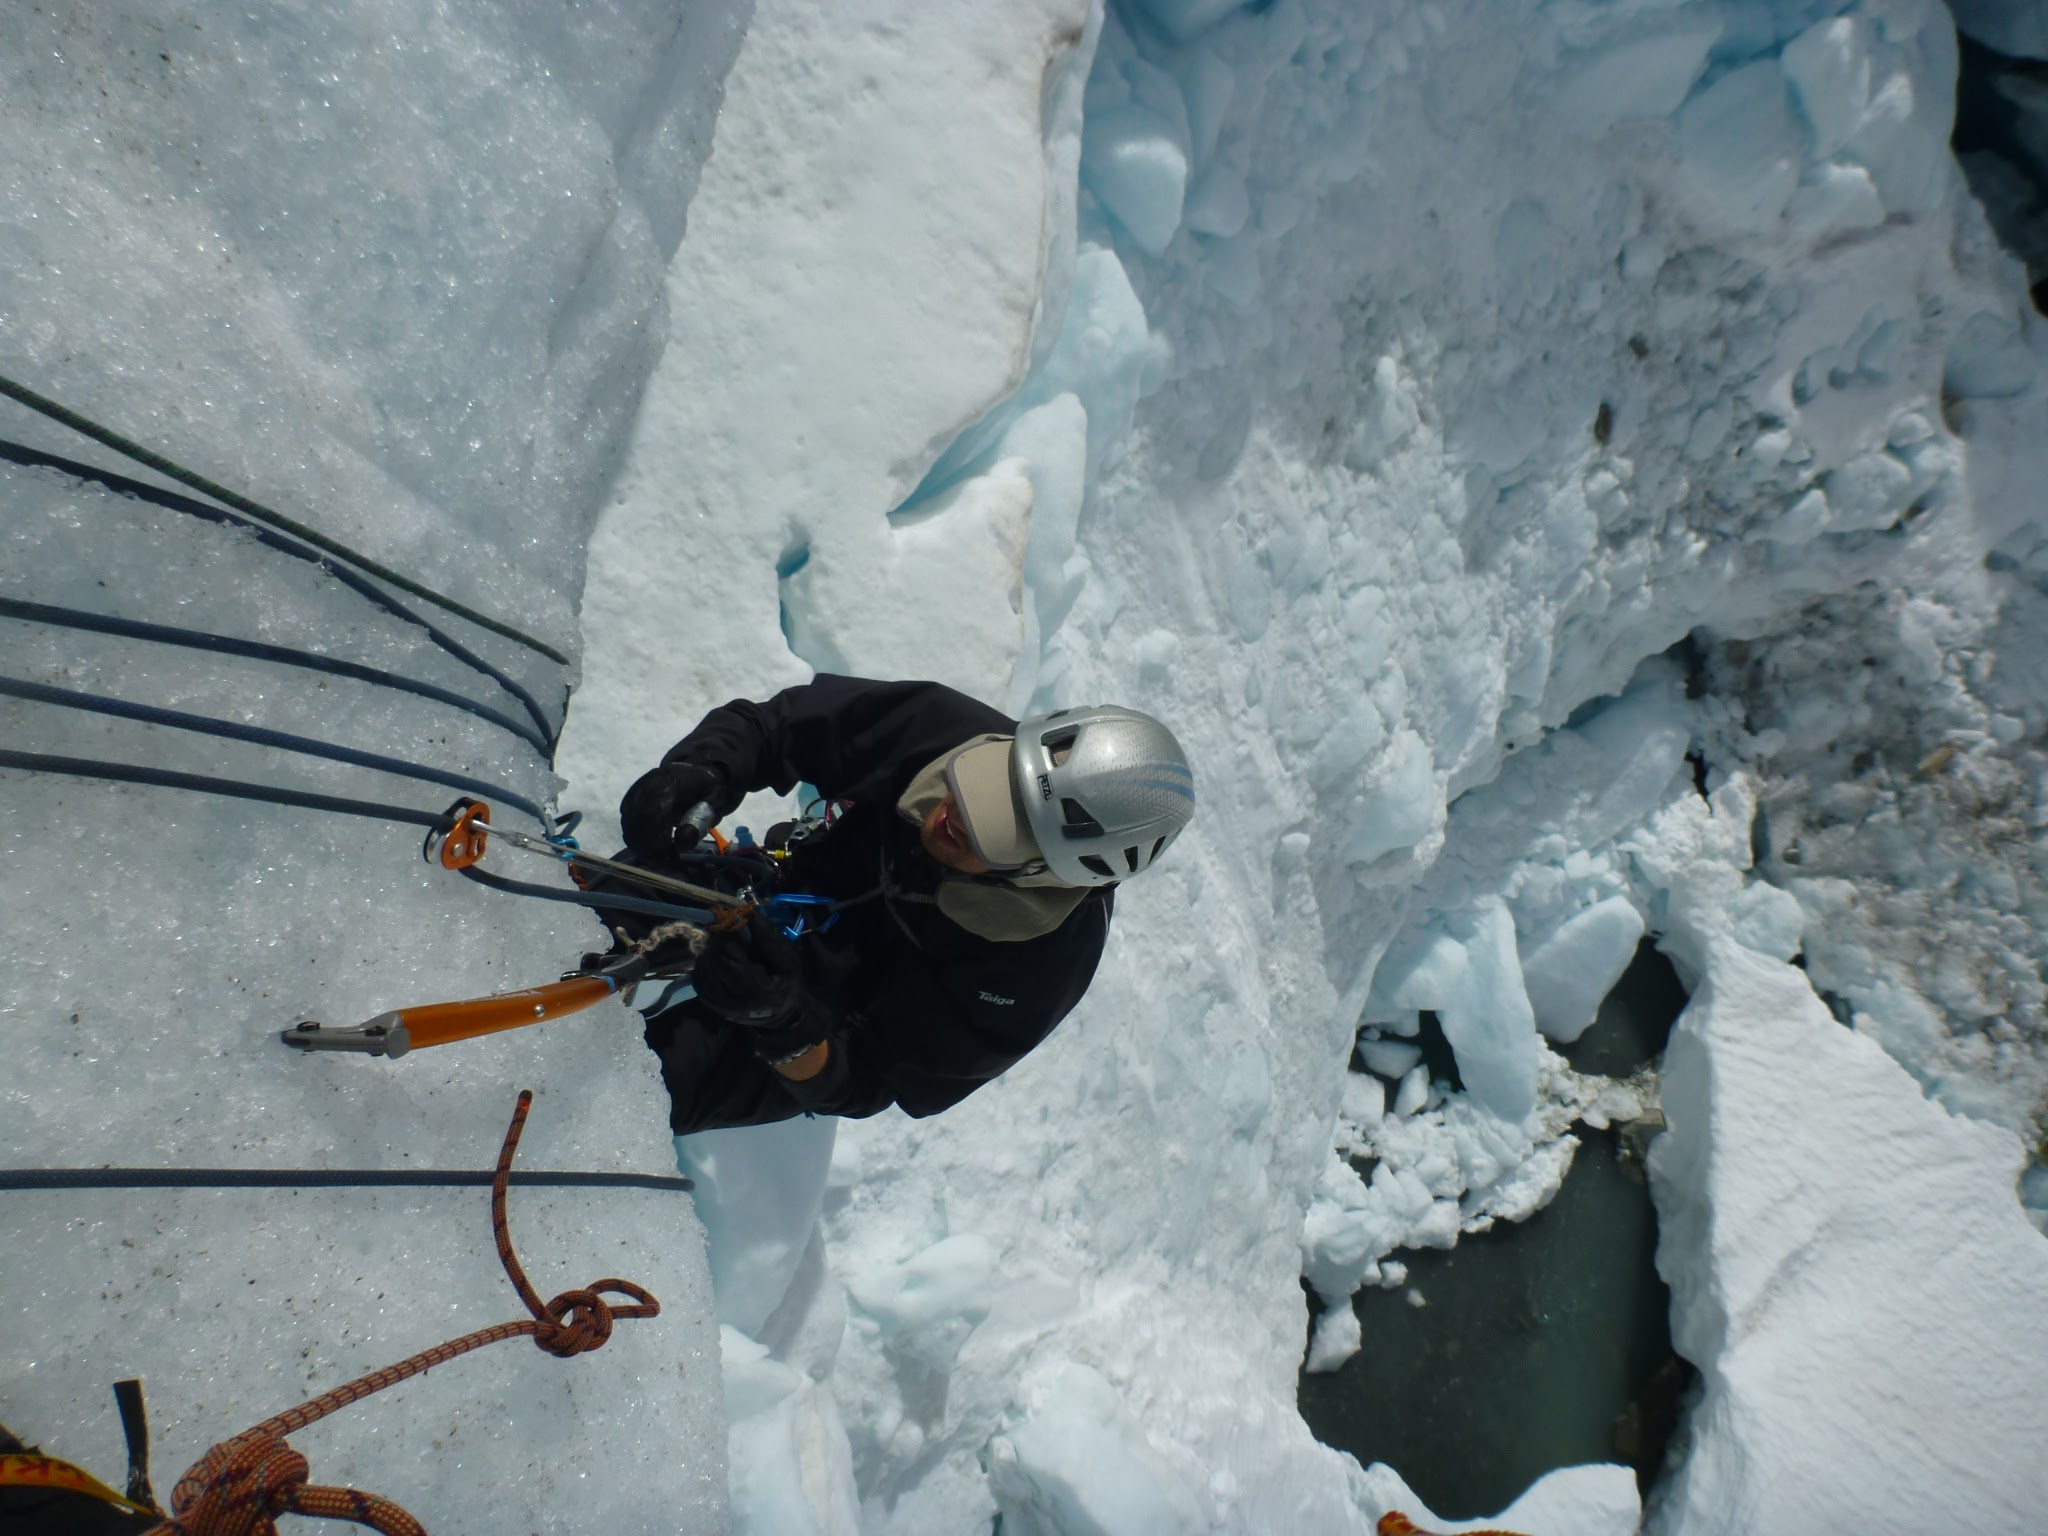
In Micro Traxion we believe. Photo by Caitlin Schneider
Here is a summary of the various things we learned.
Self-arrest:
No enough data.
Based on previous experiences, it is at best very hard to successfully self-arrest in a two-man rope team. Maybe, as Christian Veenstra suggested, the rope should instead be seen as a brake to slow the victim down (hopefully before his partner reaches the edge of the crevasse). I would leave at least 20m between me and my partner.
Anecdote: Not long after this trip, Caitlin and I went up Mt Rainier. While we were post-holing past giant crevasses that were easily 20m deep, in a whiteout, exhausted by the fresh snow, the altitude and our heavy packs I had absolutely no doubt that neither of us had the slightest chance of self-arresting if the other was to fall in a crevasse.
Building anchor while in self-arrest:
The soft snow made this very easy. On hard-packed snow, this would be quite different.
Hauling systems:
-
Pulling on the rope without a hauling system is an exercise in futility.
-
A 2:1 system is not any better.
-
A 3:1 system works as long as there is not too much friction between the victim and the crevasse wall. We (barely) managed to pull the bag while it was free hanging, but as soon as it reached the overhang, it was impossible to move it without having someone to pull the rope away from the icy lip.
-
The Mammut rescyou 7:1 system works and is the easiest to set up and manage. It suffers from the same limitations as the 3:1 system. It is also heavy (400g), not versatile and somewhat expensive.
We also experimented with various pulleys while setting up the system.:
-
Locking carabiner and prusik: Light, cheap, multipurpose and utterly useless without some dedicated prusik-minding person, which you obviously don’t have on a two-person rope team.
-
DMM revolver screwgate biner and prusik: Much less friction!!! But still useless…
-
SMC Mini CRx Prusik Pulley and prusik. Quite light and cheap. The pulley did its job most of the time. It still happened once or twice that the prusik managed to go past the jaws of the pulley (we used 5mm prusiks and an 8.6mm Beal cobra rope). Perhaps more concerning, the prusik once failed to catch the rope while I was relieving the tension to reset the 3:1 system.
-
Petzel Micro Traxion: Heavier than previous options, not as versatile and a lot more expensive. It also works flawlessly. The pulley is easy to set up, even when the rope is under tension. The cam never failed to catch the rope and, unlike a prusik, does it immediately, which matters when it is such gruelling work to bring your partner 5cm at a time. The cam could potentially develop icing problems, but conditions did not allow us to test this.
Self-rescue / hauling your partner from the bottom
As I mentioned above, in some conditions it is not possible (or so slow as to be completely impractical) to use prusiks to climb out of a crevasse. In that situation, the micro traxion can be used as an emergency ascender and proved to be very useful. Otherwise, you would need to aid climb using ice tools or ice screws.
If your partner is injured to such extent that you need to be next to them while bringing them up, I think that the Mammut rescyou system is the only practical solution. Otherwise, you will have to haul them up from the top.
In summary:
Risks that a crevasse fall will have a dramatic outcome increase exponentially when you travel on a two-person rope team.
Self-arresting is extremely unlikely.
If your partner can’t use his legs to assist you, hauling him out of a crevasse will take hours and will not be possible without the right gear.
Food for thought:
People (like myself and many others in the VOC) who learn about glaciers and crevasses on the BC coast are a bit spoiled by snow conditions. Around here, snow bridges are usually solid and easily spotted. It is easy to build confidence regarding your ability to spot crevasses and navigate on a glacier. As a result, you may even decide to venture on a glacier unroped. I have done this and will likely do it again, depending on the terrain and snow conditions. However, it is very important to keep in mind that in places were the snow is much drier, weak snow bridges that are only 5cm thick and completely invisible can form. You don’t even need to go to Alaska (http://publications.americanalpineclub.org/articles/13201212989/Fall-Into-Crevasse-Traveling-Unroped-on-a-Glacier) to encounter such crevasses. Conditions in the Rockies are also favourable for such snow bridges to form. Caitlin and I recently came back from Mt Robson. While camping on the Dome, a relatively flat area around 3000m, we found perfectly hidden crevasses 15m away from camp. The high winds and powdery snow can do wonders to camouflage them in only a few hours.

Nicely hidden crevasse on Mt Rainier. Caitlin’s backpack prevented her from going down all the way. Photo by Julien Renard
I’ve seen perfectly hidden and thinly bridged crevasses on the Wedgemont Glacier but that was a few years ago. I’ve also dropped into a slot in the Waddington area and gotten saved by my pack getting caught at the top of the crevasse.